Tools Needed to Adjust Kitchen Cabinet Doors

To adjust kitchen cabinet doors, you will need the following tools
How to Adjust Kitchen Cabinet Doors
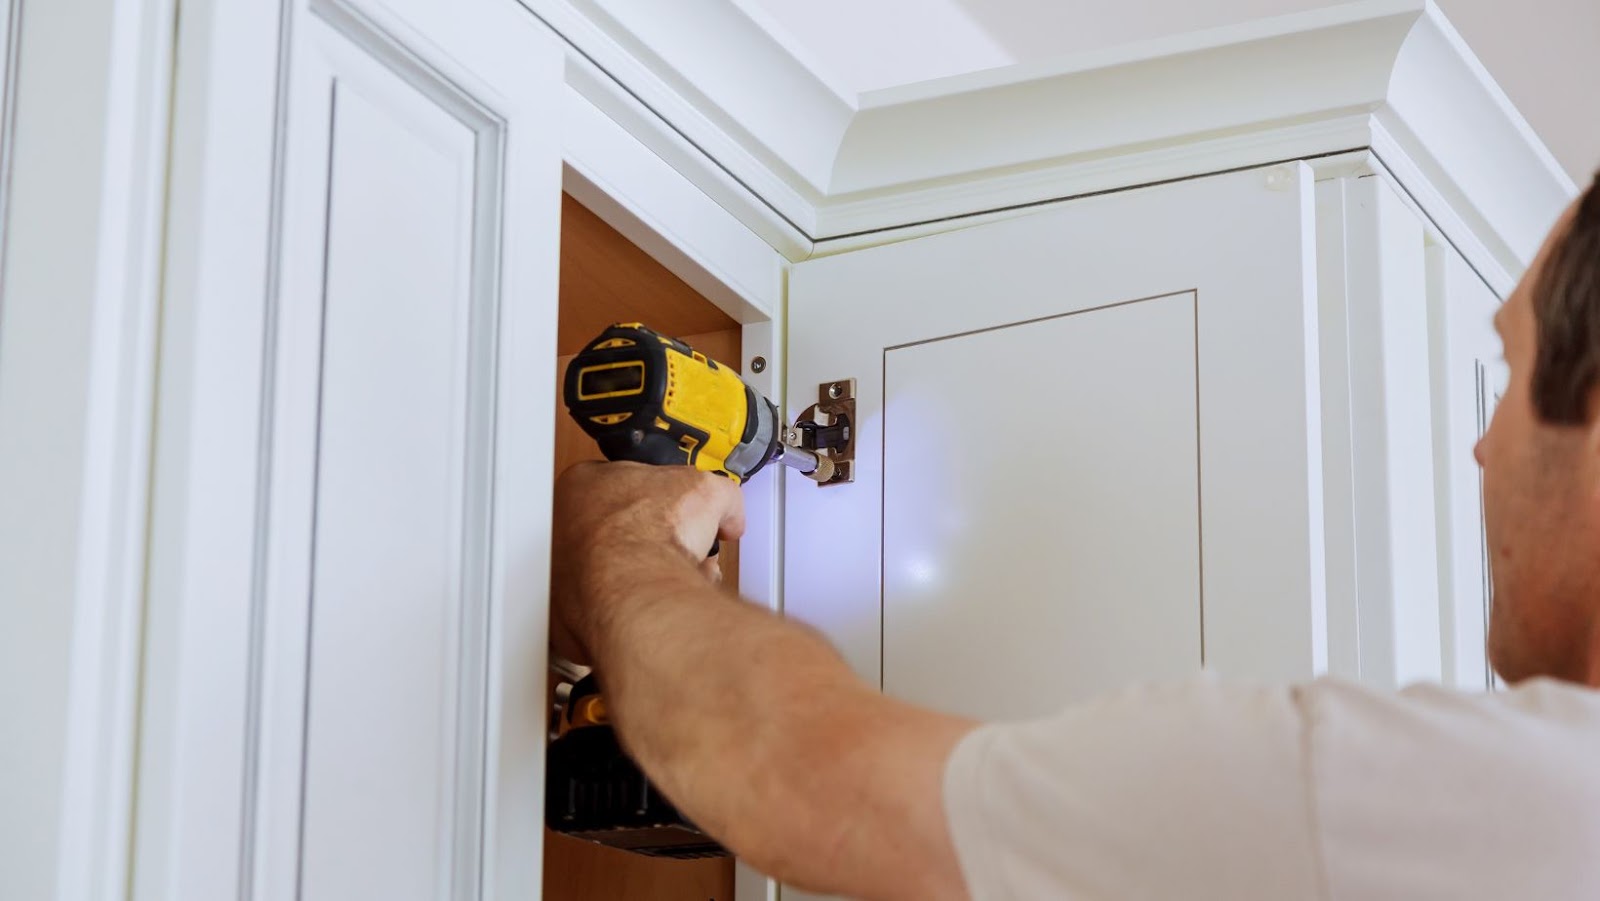
Screwdriver: The screwdriver is needed to loosen or tighten the screws that hold the hinges of the cabinet doors in place.
Measuring tape: Measuring tape is required to check if the cabinet doors are level and how much adjustment is needed to achieve levelness.
Level: A level allows you to check the evenness of your cabinet doors both vertically and horizontally.
Drill: In some cases, you may need to drill new holes for the screws to change the position of the hinge. A power drill makes this task easier.
Hinge adjustment tool: Some modern hinges have adjustment tools for easy and precise adjustments. If you have such hinges, be sure to get the corresponding hinge adjustment tools from your hardware store.
With these tools, adjusting your kitchen cabinet doors will be a breeze. Pro tip: If you’re not experienced with DIY projects, it’s best to seek professional help to avoid damage to your cabinets.
Measuring Tools
Adjusting kitchen cabinet doors requires the right tools to get the job done right. There are several measuring tools that come in handy when adjusting your kitchen cabinet doors. These measuring tools can help you determine the size of the cabinet door, the material needed to adjust the door, and the proper fit of the door.
Let’s look at the type of measuring tools needed to adjust kitchen cabinet doors.
Tape Measure
A tape measure is an essential tool to have when adjusting kitchen cabinet doors.
Here’s how to use a tape measure to adjust your kitchen cabinet doors successfully:
Measure the width and height of the cabinet doors that need adjusting using a tape measure.
Identify which doors need to be adjusted and in what way.
Measure the distance between the cabinet door and the cabinet frame using the tape measure.
Loosen the screws holding the cabinet door and move it into the desired position.
Measure again to ensure the door is in the precise position and tighten the screws.
Using a tape measure is key to ensuring the accurate measurement of your cabinet doors, leading to a seamless adjustment of your kitchen cabinet doors.
Combination Square
Combination square is one of the essential measuring tools required to adjust kitchen cabinet doors accurately. Along with standard measuring tapes, levels, and clamps, combination square aids in measuring angles and checking if the corners are square. It is a multi-functional tool, which usually includes a ruler, protractor, and mitre square, making it an all-in-one tool for carpentry and woodworking.
Here’s how to adjust your kitchen cabinet doors using a combination square:
Step 1: Check the level of the cabinet doors to ensure that they are not unbalanced.
Step 2: Place the combination square inside the cabinet and check if the corner angles are at 90 degrees. Adjust the screws or hinges until they are.
Step 3: Use the ruler on the combination square to measure the gaps between the cabinet doors and adjust them accordingly.
A combination square is a sturdy tool that can last for years, making it a valuable addition to your toolbox. With its help, your kitchen cabinet doors will be adjusted perfectly in no time.
T-Bevel
T-bevel is a handy tool that can be used to adjust the angle of your kitchen cabinet doors. It consists of a handle, a blade, and an adjustable arm, which can be locked at any angle.
Here’s how to use a T-bevel to adjust your kitchen cabinet doors:
1. Set the blade of the T-bevel to match the angle of the door corner.
2. Lock the adjustable arm of the T-bevel in place.
3. Place the T-bevel against the corner of the door and adjust the angle until it matches the angle of the cabinet frame.
4. Use a screwdriver to adjust the hinge screws on the door until it matches the desired angle.
5. Once the door is aligned correctly, tighten the hinge screws to secure the door in place.
Note that T-bevels come in different sizes, so choose the one that’s appropriate for your cabinet doors.
Adjustment Tools
Adjusting kitchen cabinet doors can be a simple Do-It-Yourself (DIY) project for those who are handy with tools. All you need is the right set of adjustment tools to help you get the job done quickly and safely.
In this article, let’s look at what tools are required for adjusting kitchen cabinet doors.
Screwdrivers
Screwdrivers are an essential tool when it comes to adjusting kitchen cabinet doors. Here are the types of screwdrivers you’ll need for the job:
Flat-Head Screwdriver: This tool is characterised by its flat and narrow head, ideal for unscrewing flat-head screws. To adjust your kitchen cabinet doors, use a flat-head screwdriver to loosen or tighten the screws on the hinges.
Phillips-Head Screwdriver: This screwdriver has a cross-shaped head that fits screws with an X-shaped slot. Many cabinet hinges use Phillips-head screws, so make sure to have one available.
Electric Screwdriver: With its rotating head, an electric screwdriver can save you a lot of time and energy when it comes to adjusting cabinet doors. Choose one that’s small and easy to manoeuvre, with a variety of interchangeable bits.
By using screwdrivers and other simple adjustment tools, you can easily fix any problems with crooked, sagging or sticking kitchen cabinet doors in no time.
Allen wrenches
Allen wrenches are essential adjustment tools needed to adjust kitchen cabinet doors. These wrenches, also known as hex keys, are compact and versatile tools that can be used to adjust a variety of screws, bolts, and hexagonal head fasteners used in cabinets, furniture, bicycles, and motorcycle maintenance.
To adjust kitchen cabinet doors using an Allen wrench, follow these steps:
1. Locate the adjustment screws at the top or bottom of the cabinet hinges.
2. Insert the appropriate size Allen wrench into the adjustment screw.
3. Turn the wrench clockwise or counterclockwise to adjust the door up, down, left, or right, depending on your needs.
4. Test the door to make sure it opens and closes smoothly and adjust further as needed.
With a few simple adjustments using an Allen wrench, you can quickly fix misaligned or sagging cabinet doors and give your kitchen a fresh, updated look.
Pliers
One of the essential tools needed to adjust kitchen cabinet doors is a pair of pliers, specifically, tongue-and-groove pliers.
Here’s how you can use pliers to adjust kitchen cabinet doors:
Open the cabinet door and locate the hinges.
Use the pliers to grip the hinge knuckles firmly and gently bend them in the direction you want the door to move.
Check the alignment of the door and adjust the hinges accordingly until the door is straight.
Repeat the process for the other hinges until all the doors are adjusted to your satisfaction.
Pro tip: It’s always best to have a few adjustment tools on hand when fixing your kitchen cabinet doors, including screwdrivers, pliers, and a level. With the right tools, you can quickly and easily adjust your cabinet doors and keep them functioning correctly.
Shims and Other Supplies
When it comes to adjusting kitchen cabinet doors, there are a few tools you will need to have on hand. Shims are one of the most important supplies you will need, as they can be used to fill in the gaps between the frame and the door and help get the door into alignment.
Other supplies you may need include a drill, screwdrivers and various screws, a level, and possibly wood glue.
Wooden Shims
Wooden shims are essential supplies needed to adjust kitchen cabinet doors. These thin and wedge-shaped pieces of wood are used to fill gaps between the cabinet and the door hinges, which often cause the door to sag or misalign.
Here are the tools needed to adjust kitchen cabinet doors:
Screwdriver: This tool is used to tighten or loosen the screws that hold the door hinges in place.
Leveller: A leveller is needed to check the alignment of the cabinet and the door, ensuring that they are straight and plumb.
Wooden shims: As mentioned earlier, wooden shims are used to fill gaps between the cabinet and the door hinges to stabilise them.
Drill: A drill is necessary to make pilot holes for the hinges when reattaching them to the cabinet.
Hammer: If the hinges are stuck, a hammer can be used to tap them loose gently.
By using these tools, you can easily adjust your kitchen cabinet doors and keep them aligned and functional. Pro Tip: To prevent future door sagging, tighten all the screws and bolts in the cabinets regularly.
Felt Pads
Felt pads are essential supplies for adjusting kitchen cabinet doors. These small and versatile pads can be used as shims to make precise adjustments and prevent damage to your cabinets.
Here’s how to use felt pads to adjust your kitchen cabinet doors:
Step 1: Remove the cabinet door from its hinges and place it on a flat surface.
Step 2: Identify the side of the door that needs adjustment.
Step 3: Attach a felt pad to the corner of the cabinet door that needs to be raised or lowered.
Step 4: Reattach the cabinet door to its hinges and check the alignment.
Step 5: Repeat the process as needed, adjusting the felt pads until you achieve the perfect fit.
Felt pads can also be used to protect your cabinets and drawers from scratches and damage caused by opening and closing. Simply attach a felt pad to the inside of the cabinet or drawer where it comes into contact with the frame. Pro tip: To make the felt pads stick better, clean the surface with rubbing alcohol before attaching the pad.
Drawer Slide Spacers
Drawer slide spacers, also known as shims, are a useful tool for adjusting kitchen cabinet doors. These small plastic pieces can be easily inserted between the drawer slide and cabinet frame, allowing for a precise fit and smooth sliding motion.
Here’s how to use drawer slide spacers for adjusting kitchen cabinet doors:
First, remove the cabinet’s drawer slide from the cabinet frame.
Identify the area where the slide appears to be loose or wobbly.
Insert shims between the slide and the cabinet frame at the identified area.
Reinstall the drawer slide.
Test the drawer’s sliding motion to see if it needs further adjustment.
Keep adding or removing shims as needed until you achieve a precise fit and smooth sliding motion for your cabinet doors.
Pro tip: Drawer slide spacers come in different sizes and thicknesses, so make sure to choose the right one for the job.
Adjusting Cabinet Hinges
Making adjustments to kitchen cabinet doors can be a tricky business as it requires precision and accuracy. But don’t fear, with the right tools, adjusting cabinet hinges can be done with ease.
In this article, we’ll walk through the tools you’ll need to successfully adjust your kitchen cabinet doors.
Understanding Euro-Style Hinges
Euro-style hinges are a popular choice for modern kitchen cabinetry because of their sleek design and ability to easily adjust cabinet doors. Understanding how to adjust these hinges can help you achieve a seamless and functional kitchen cabinet. The following are the tools needed to adjust euro-style cabinet hinges for perfectly aligned kitchen cabinet doors.

1) Screwdriver: A screwdriver is essential for loosening or tightening screws on the hinges when adjusting cabinet doors.
2) Drill: A drill is needed when adjusting the mounting plate of the euro-style hinge.
3) Level: Adjusting cabinet doors to be level is important, and a level is used to ensure it’s perfectly horizontal.
4) Measuring Tape: Measuring the height and width of the cabinet door and frame to ensure it’s properly centred is crucial.
5) Hinge Adjustment Tool: A hinge adjustment tool might come included with the hinge kit or can be purchased separately to aid in adjusting the hinges.
Pro Tip: To troubleshoot any issues with adjusting euro-style hinges, read the instruction manual that comes with the hinges. It’s best to make small adjustments, and test each time to avoid misalignment of the cabinet doors.
Adjusting the Height of the Cabinet Door
Adjusting the height of the cabinet door is a necessary step in ensuring that your kitchen cabinet doors close properly and look good. Here are some tools you will need to adjust kitchen cabinet doors and the steps to follow:
Tools needed:
– Screwdriver
– Pliers
– Drill (optional)
Steps:
1. Locate the hinge that needs adjustment. Most cabinets have two hinges per door.
2. Use a screwdriver to loosen the screws holding the hinge in place.
3. Use pliers to lift or lower the cabinet door to the desired height.
4. Tighten the screws on the hinge.
5. Check that the door closes properly and adjust as necessary.
If the hinge is damaged or the door is not aligned properly, remove the hinge and reattach it with screws or use a drill to make new holes. Regular adjustment of cabinet doors is vital to keep your kitchen functional and looking good.
Pro tip: Keep the screws loose enough to adjust the door, but not so loose that the screw falls out or the hinge becomes wobbly.
Aligning Cabinet Doors Vertically and Horizontally
Aligning your cabinet doors both vertically and horizontally is an essential step towards achieving a streamlined and polished look in your kitchen. Here are the tools that you will need to adjust your kitchen cabinet doors and how to use them:
1. Screwdriver – Find the screws on the inside of the cabinet door and adjust one at a time until the door is at the desired height or level.
2. Drill – If the hinges are stripped or have become too loose, remove the old screws and drill new pilot holes.
3. Level – Use a level to ensure that the doors are even both vertically and horizontally.
4. Cabinet door bumpers – These can be added to the back of the cabinet to give more clearance between the door and the cabinet frame.
By using these simple tools, you can easily adjust and align your kitchen cabinet doors for a professional and aesthetically-pleasing finish.
Adjusting Drawer Slides
Cabinet doors and drawers need to be adjusted from time to time. This is a fairly straightforward task that only requires a few tools and no special skills.
To adjust your kitchen cabinet doors, you will need a screwdriver, a hex wrench, and a flathead screwdriver. With these tools, you can easily adjust kitchen cabinet doors and drawers.
Understanding Drawer Slides
Drawer slides are an essential component of a functional drawer system. They provide a smooth and quiet movement to the drawer, making it easy to open and close. Understanding drawer slides is important for making necessary adjustments and repairing any issues with the drawer movement.

Here are some key points to keep in mind when it comes to drawer slides:
- There are different types of drawer slides including side-mounted, centre-mounted, under-mount, and European-style.
- Drawer slides can be made from metal or plastic materials, with ball bearings or roller wheels for added support.
- To adjust drawer slides, you will need a Phillips head screwdriver or drill, and possibly pliers, depending on the type of drawer slide and the specific issue you are facing.
- When adjusting kitchen cabinet doors, you may also need a drill, level, and tape measure to ensure proper alignment.
Proper maintenance and adjustment of drawer slides can prolong the life of your drawers and ensure smooth operation for years to come.
Adjusting Roller Slides
Drawer slides are an integral part of any kitchen cabinet and ensuring they are adjusted properly is important to ensure your kitchen cabinet doors open and close smoothly.
Here are the steps to follow to adjust drawer slides:
First, you will need a phillips head screwdriver, a drill, a level, and a tape measure.
Start by identifying the two adjustment screws on each drawer slide. One screw moves the slide forward and backward, while the other moves it up and down.
Loosen both screws on each slide, and adjust the slide to the desired position, using the level and tape measure to ensure it is straight and aligned.
Once the slide is in position, tighten the screws to hold it securely in place.
Test the drawer to make sure it slides smoothly and adjust further if needed.
With these simple steps, you can adjust your drawer slides and keep your kitchen cabinet doors operating properly.
Adjusting Ball Bearing Slides
Adjusting ball bearing slides is a straightforward process that can significantly improve the functionality of your drawers. Here are the steps to adjust them accurately and the tools you will need.
Steps:
1. Remove the drawer from the cabinet.
2. Examine the slides to see if any parts are bent, damaged or need lubrication.
3. Adjust the rollers or glides on the slides to remove any side-to-side, up-and-down or front-to-back movement, ensuring they’re level and evenly spaced.
4. Ensure the catch and release latches are working properly and not sticking, preventing the drawer from easily sliding in or out.
Tools Needed: Screwdriver, pliers, level
By following these steps and utilising the proper tools, you ensure that your kitchen cabinets function smoothly and without unnecessary noise, strain or friction affecting the drawer glides.

 The Benefits Of Outdoor Sofa Deep Seating
  This Method has Been Used for Centuries
  The Different Types of Bonds
  Solar Panel Cost And Efficiency
  The Most Comfortable Deep Seating Outdoor Furniture
  Maintaining Your Glass Cabinet Doors